The Complete Guide to Beekeeping in Minecraft: From Finding Bees to Building Automated Farms
Master beekeeping in Minecraft 2026 with our expert guide—learn how to find, transport, and farm bees for sustainable honey and resources.
As 2026 unfolds, the art of beekeeping in Minecraft remains a cornerstone of sustainable base management for seasoned adventurers and casual crafters alike. These industrious insects are more than just ambient mobs; they are living factories producing honey for potions and food, and honeycomb for decorative wax blocks. Establishing a thriving apiary near your home provides a renewable, hands-off resource stream, turning a patch of flowers into a buzzing economic hub. However, the journey from spotting your first wild bee to harvesting golden honeycombs from an automated farm requires knowledge, patience, and a bit of redstone ingenuity. This guide will walk you through the entire process, from locating these precious pollinators to constructing a sophisticated farm that works while you're off exploring ancient cities.
How to Find and Transport Your First Bees
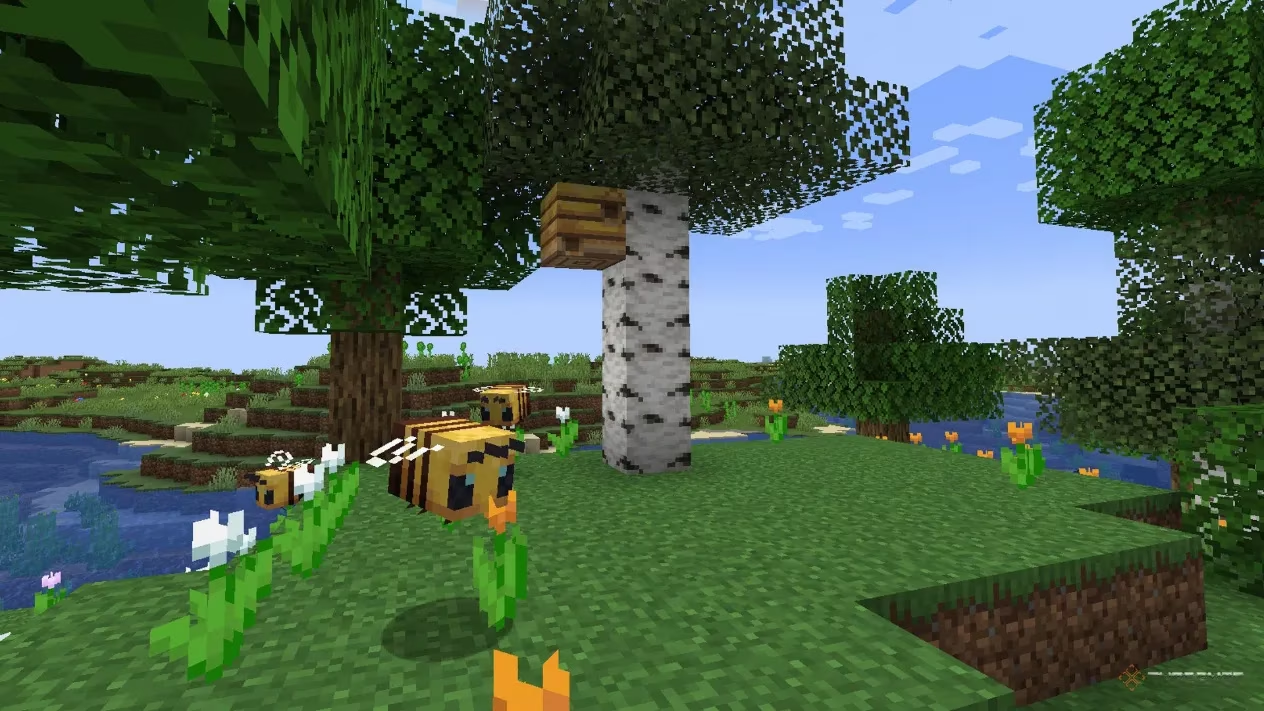
The quest for bees begins in the sun-dappled clearings of specific biomes. Bee nests, those distinctive yellow blocks humming with activity, spawn naturally on oak or birch trees in several lush regions. For the highest chance of a quick find, veteran players often recommend scouring Meadow biomes, which are not only common but also teem with the flowers bees adore. A natural bee nest is like a tiny, buzzing treasure chest, always containing three bees ready to venture out. These fuzzy foragers are surprisingly adventurous, roaming up to 22 blocks from their home in search of pollen, but they possess an unerring homing instinct, always returning to the nest at nightfall or when the rain begins to patter down.
Once you've found a nest, you have two primary methods for a bee relocation program:
-
The Silk Touch Method: This is the most elegant solution. Using any tool enchanted with Silk Touch allows you to harvest the entire nest block, bees and all, without disturbing its inhabitants. It's as if you're carefully transplanting a whole ecosystem, pot and soil included. Place the nest at your base, and the bees will emerge, ready to adopt their new floral surroundings.
-
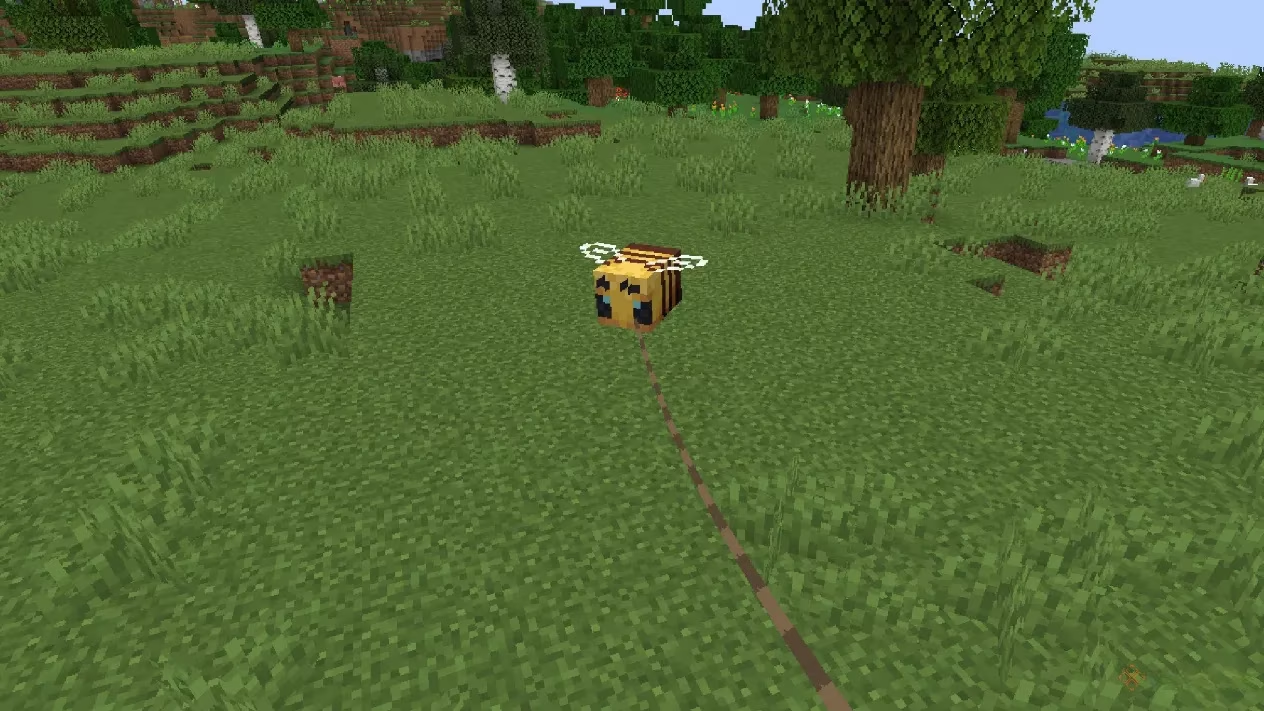
The Lead Method: If you're early in your game and lack Silk Touch, fear not. You can tether bees directly with a lead. Attaching a lead to a bee is like putting a tiny, voluntary leash on a cloud of pollen; you can gently guide them home, though it requires a more hands-on approach.
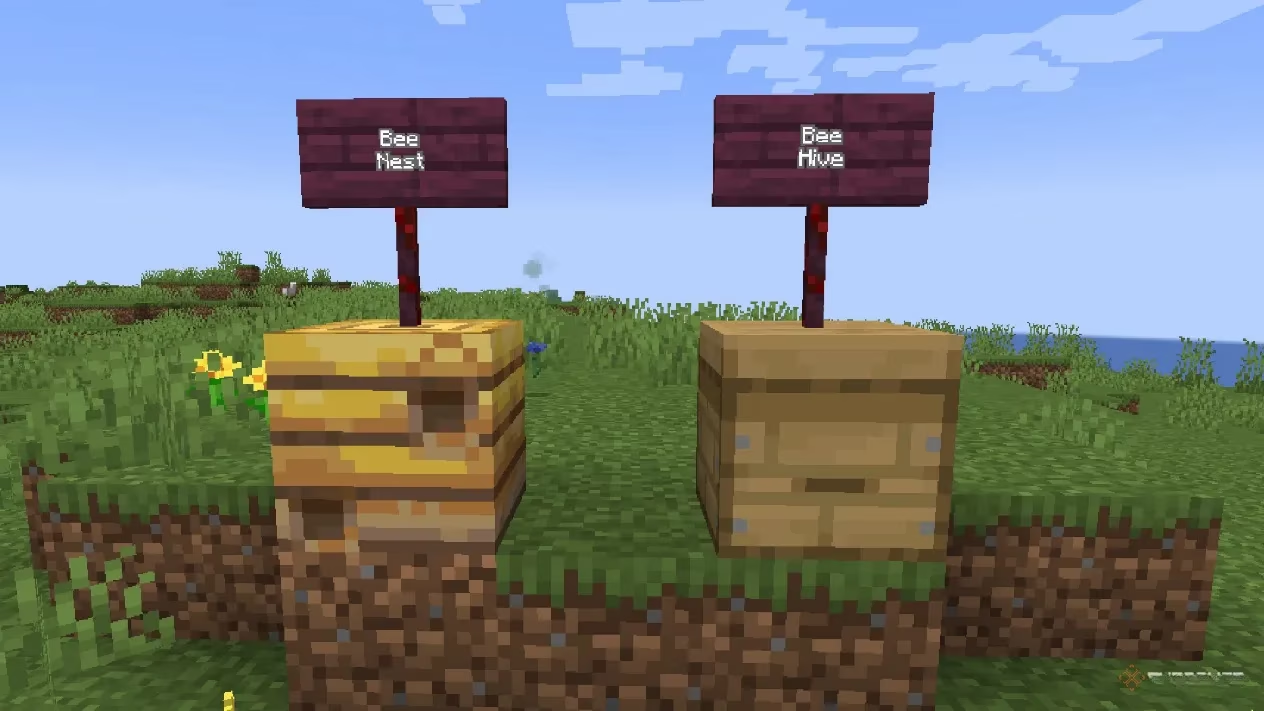
Bee Hive vs. Bee Nest: Knowing Your Real Estate
Understanding the difference between a Bee Nest and a Bee Hive is crucial for any apiarist. Think of a Bee Nest as a wild, ancient tree hollow—it's a natural wonder you find in the world that cannot be crafted. Harvesting it without Silk Touch destroys it, scattering its precious honeycombs. In contrast, a Bee Hive is the crafted suburban home for your bees. It's functionally identical to a nest but is built by your own hand, requiring:
-
6x Any Plank
-
3x Honeycomb
Bee Hives are perfect for expanding your colony through breeding or for giving relocated bees a new, purpose-built residence. They represent your control over the natural process, turning beekeeping from foraging into a proper husbandry skill.
Building Your Automated Bee Farm: A Step-by-Step Symphony
Now for the main event: constructing a farm that harvests honey and honeycomb automatically. This design uses redstone to create a system as precise as a Swiss watch mechanism, ensuring you never get stung during collection. The core principle involves using observers to detect when a hive is full, triggering dispensers to collect the goods, which then funnel into a chest via hoppers.
Phase 1: The Foundation and Enclosure
-
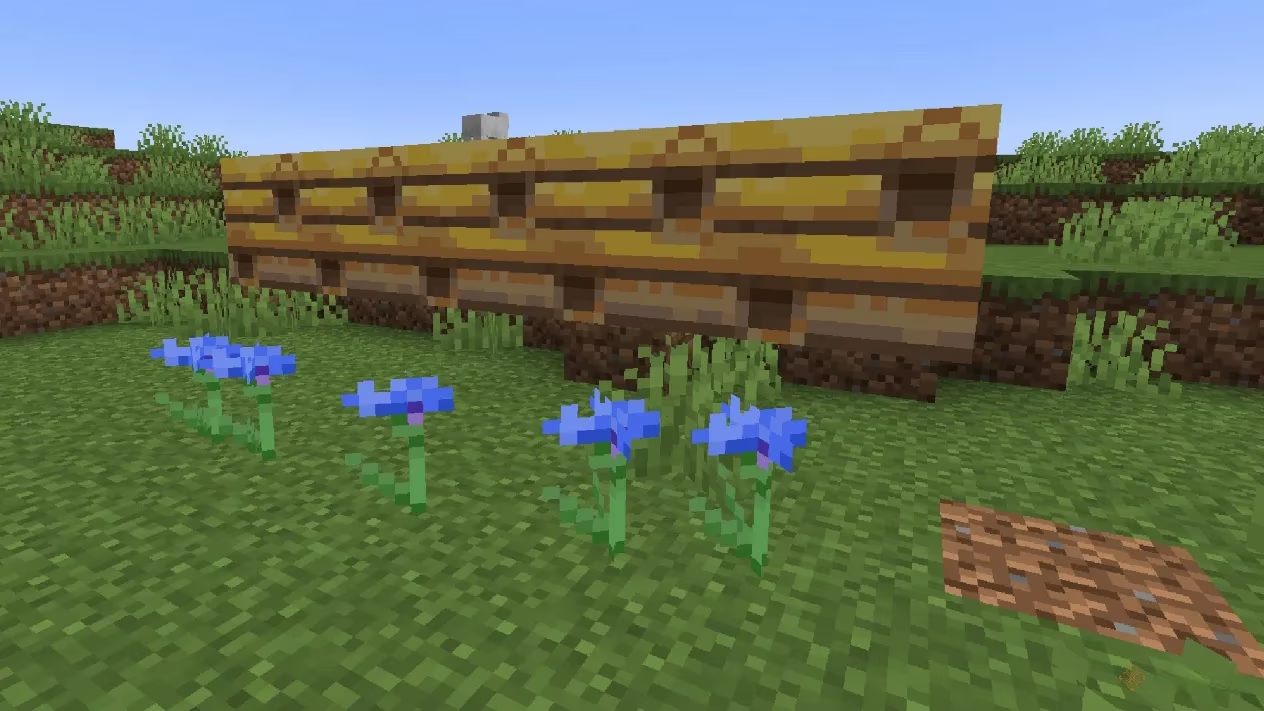
Place Your Hives: Start by placing your Bee Nests or Bee Hives one block above the ground in a straight line. You can build as many as you wish—your farm's size is only limited by your ambition and resources.
-
Plant Flowers: Directly in front of the hives, plant a row of flowers. The type is irrelevant; a dandelion works as well as a rare blue orchid.
-
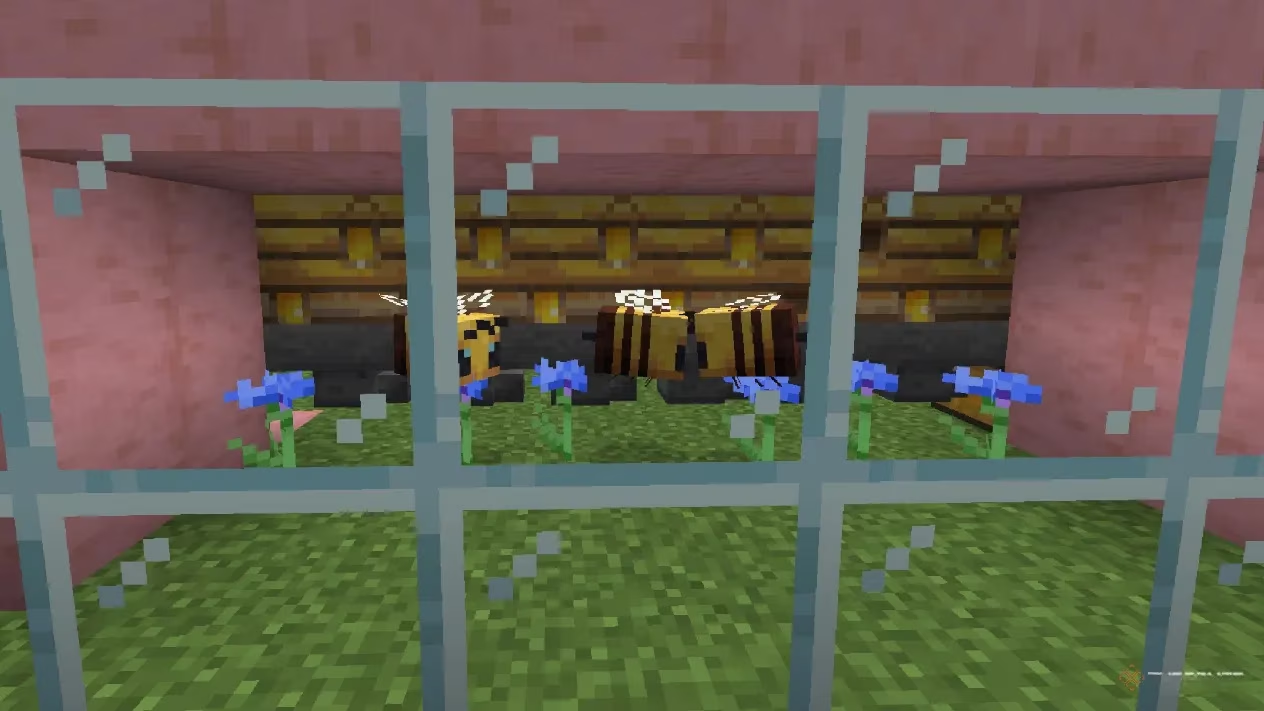
Build the Walls: Enclose the hives and flowers on three sides (back, left, right) and the top. Using glass for the front wall is highly recommended; it allows you to watch your bees work, turning your farm into a living diorama. This enclosure prevents bees from wandering off and getting lost, which is as frustrating as losing a needle in a haystack.
Phase 2: The Redstone Collection System
This is where the automation magic happens. We'll build the mechanism behind the hives.
| Step | Action | Purpose |
|---|---|---|
| 1 | Place a Chest on the ground to the left of your hive line. | This is the final destination for all harvested goods. |
| 2 | Attach a Hopper to the side of the chest. Then, chain more Hoppers together so one sits directly beneath each hive. | Creates an item pipeline from the hives to the chest. |
| 3 | Stand on top of a hive. Place an Observer block facing directly down onto it. The red dot should face up. Repeat for each hive. | The Observer acts as a sensor, detecting when the hive's honey level changes (i.e., becomes full). |
| 4 | Directly behind each hive, carefully place a Dispenser. Its front (the hole) must be pointing directly into the back of the hive. | This is the "hand" that will perform the harvesting action. |
| 5 | On top of each dispenser, place Redstone Dust. Then, on the block behind the dispenser (opposite the chest side), place a Redstone Torch. | Creates a circuit that inverts the observer's signal, correctly powering the dispenser. |
Phase 3: Loading and Populating the Farm
With the structure complete, you need to tell it what to harvest.
-
For Honeycomb: Put a pair of Shears in each dispenser. Shears are durable and will last through many harvests.
-
For Honey: Place an Empty Glass Bottle in each dispenser. Bottles are single-use, so this requires more maintenance.
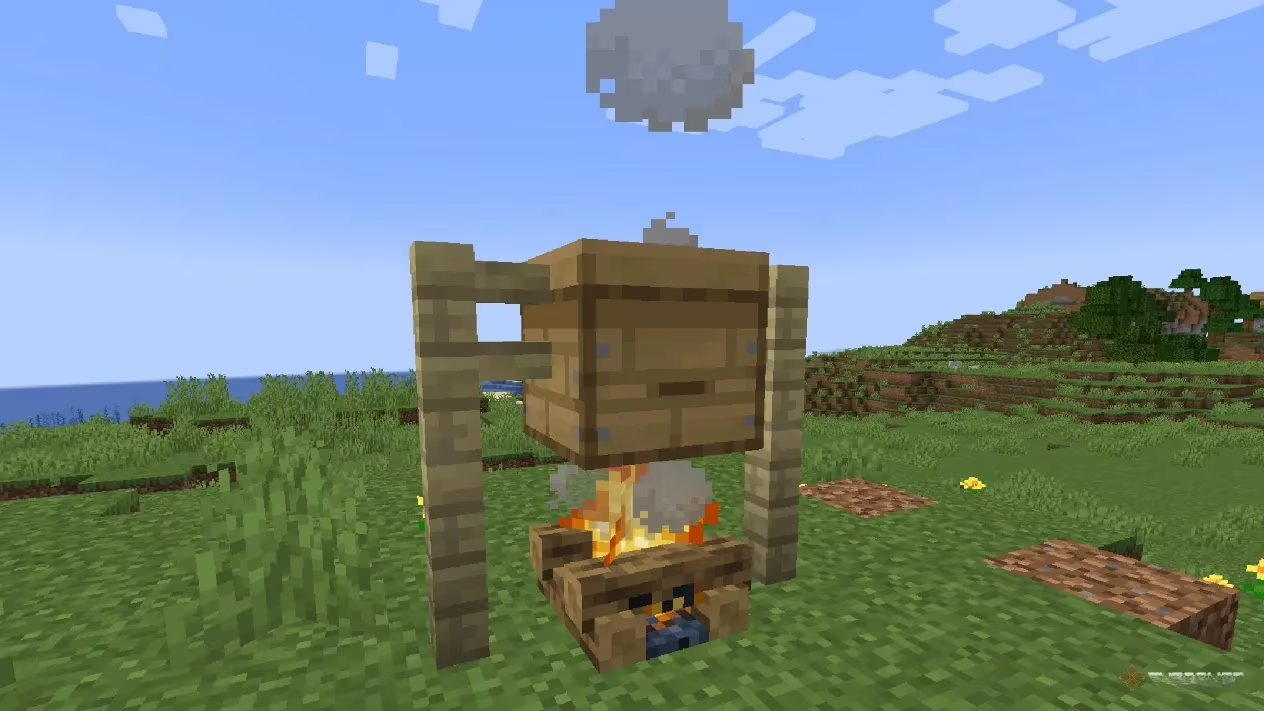
Pro Tip: Remember the classic beekeeping trick! Placing a Campfire (or a block with fire underneath) directly beneath the hive pacifies the bees during manual harvesting. In this automated setup, the dispenser does the work, so the bees won't attack, making the campfire optional but a good safety measure if you ever need to interact directly.
Finally, introduce your bees! Temporarily open the front of the enclosure and bring in at least two bees. You can breed more by giving each bee a flower, causing them to enter "love mode" and produce a baby bee. Soon, your farm will be a humming, productive engine.
Maintenance and Final Thoughts
Your automated bee farm is now operational! The bees will pollinate flowers, fill the hives, and the redstone system will silently collect the proceeds. Remember:
-
Bottle Check: If you're farming honey, you must periodically replace the empty bottles in the dispensers. Setting up a separate hopper line to feed bottles into the dispensers can solve this, creating a truly hands-free system.
-
Shear Durability: Keep an eye on your shears' durability. While they last a long time, they will eventually break. Consider using Unbreaking III enchanted shears for an almost permanent solution.
Mastering beekeeping in Minecraft is a rewarding endeavor that blends exploration, construction, and subtle automation. From the serene meadows where your journey begins to the satisfying clink of honey bottles filling a chest at your base, it's a cycle that adds rich depth and self-sufficiency to your world. Happy farming! 🐝